Maximize Glass Paint Adhesion with Vitrocoat: A Guide to ASTM D3359 Testing
Vitrocoat Glass Paint stands out for its exceptional adhesion to all types of glass, surpassing the performance of standard glass paints that often suffer from delamination and peeling. To ensure the highest quality and durability, Vitrocoat has undergone a wide range of rigorous ASTM testing.
This blog post will delve into the benefits of adhesion testing, specifically reviewing ASTM D3359, and discuss the essential tools and procedures involved in the testing process.
Benefits of Adhesion Testing: Adhesion testing is crucial for evaluating the performance of coating materials, such as Vitrocoat Glass Paint, in adhering to substrates like glass. This testing method predicts the long-term durability of coatings in demanding environmental conditions. By conducting adhesion tests, manufacturers can assess the likelihood of delamination and peeling, ensuring the product meets high-quality standards.
ASTM D3359: The Adhesion Test Standard
- ASTM D3359: The Adhesion Test Standard: ASTM D3359 is the widely recognized standard for testing the adhesive strength of coatings and paints on various substrates. The process involves applying the coating, allowing it to cure completely, and then scoring the coating with a blade. A certified tape (meeting standardized pressure requirements) is applied to the coating, which is left to rest for 60 and swiftly removed to measure the adhesive strength. Adherence to ASTM D3359 ensures that the coating meets industry standards for adhesion.
Method A and Method B: The ASTM D3359 standard identifies two primary methods of adhesion testing
- Method A (X-Cut Tape Test)
- Method B (Cross-Cut Tape Test).
While both tests are effective, they are designed for different material thicknesses. Method B is particularly relevant for Vitrocoat Glass Paint applications.
ADHESION TEST – METHOD B CROSS-CUT
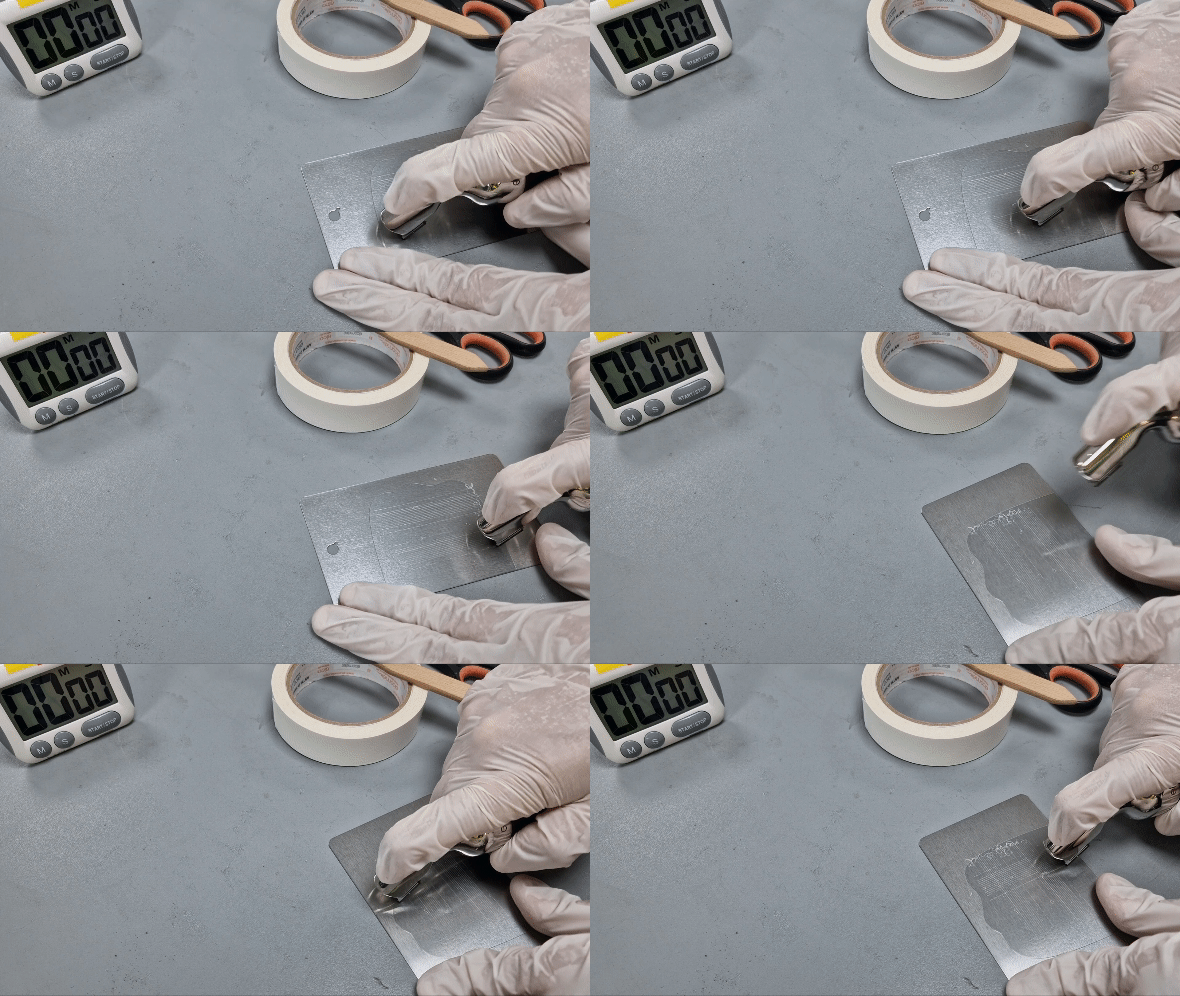
As the name implies, the Cross-cut test utilizes a specialized cutter and blade (pictured below) to score parallel lines of uniform thickness into the cured coating. The blades create a pattern of 6 or 11 individual cuts with each pass of the tool. For method B, create two perpendicular slices, one in each direction.

The blades have a unique angle between 15° and 30° and are spaced at 1 mm or 2 mm.
- 1 mm spacing for coating thickness up to 50 microns
- 2 mm spacing for coating thicker than 50 microns
For context, Method A is recommended to be used for thicknesses above 125 microns
Cuts are made at a consistent pressure into a fully cured board. After the first cut, the board is rotated 90° before a second cut is made. Tape is applied and required to rest for 60 seconds before removal.

Method A


Analyzing Adhesion Test Results
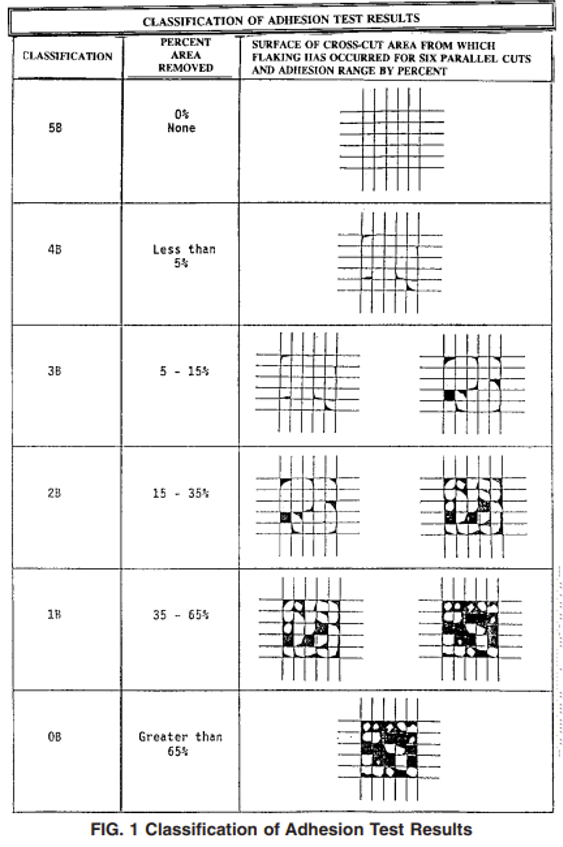
The following chart is pulled directly from the ASTM D3359 standard:

Here are some examples test results:

Interpretation of the results:
0B – majority of coating is pulled from the cut area
2B – deep scratches and coating pulled from some of the squares
4B – deep scratches with minor delamination along the lines, but no coating is pulled
5B – clear lines with no delamination (This is Vitrocoat Results of the ASTM testing)
4B and 5B ensured good quality of the coating.
Comments are closed.